post

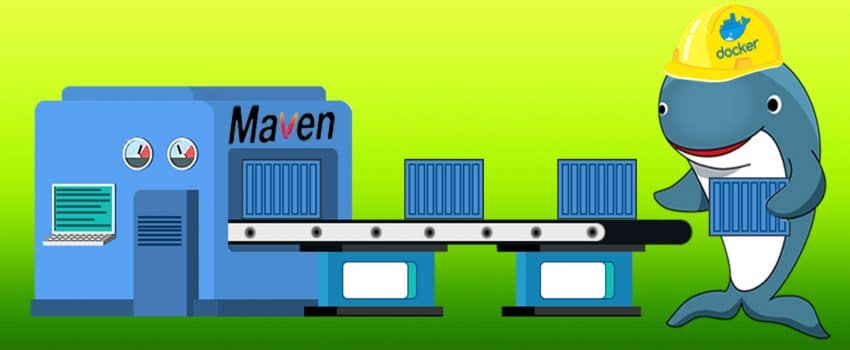
Build small docker images for Java (jlink)

1. Story

  • As a Java developer I package my project into a runnable immage, for example package it into Docker images as explained here and here. So I have runtime images in which there is a JRE(Java Runtime Environment) to execute my code. But is it performant enaugh to have entire JRE there?
  • Is it possible to select only parts of JRE that my program needs them?
  • Smaller JRE means smaller image size and also prevents wasting memory. Wow..
  • So in this post we will see how to reduce JRE size to and fits it on our project/module/code.

Please note that this all commands in this post are executable on linux and if you are using Windows or IOS, then little fitnesses is needed.

2. Solution idea by using jlink

Before Java 9, JRE was a monolithic software system. But in Java 9 a new feature comes in as a game changer with huge benefits. Java modules is the feature provided by Java Platform Module System(JPMS) in Java 9.

The general idea with Java modules is that it makes it possible to remove parts of a program which your application not be using.

With this new feature, JRE as a software system also restructured into a modular system, and now we want to recruit only JRE modules wich our application needs them.

In the other side, as the main player of our goal in this post, jlink is a tool that comes with JDK and makes it possible to assemble a set of Java modules and their dependencies into a custom and optimised runtime image.

jlink can be called via command like this:

In comming steps we use jlink in the process of packaging our application.

3. Sample java project

You can recruit any Java project that you prefer to carry out with this tutorial, but a recommendation would be using this Github repository as a very simple hello world Spring-Boot project.

4. What was the state before using jlink

At first we build a Docker image straight forward and without using jlink to see its size and in next step we will show how it will be reduced by using jlink. So in this step we built a Docker image as it explained here as "Simple Java + Docker". And we can see that its size is 238MB.

But let's see how we can make it even smaller than 238MB by using jlink.

5. Using jlink for our application

At first check your Java version by "java -version" and if it is above 9 then it would be OK for this step.

Jlink tool operates on jar files and our application is a jar file. But if your application is a war file you can copy it into a jar file by a simple command as below:

This is the main command we call for compose our custom JRE by using jlink:

In above command there is a call for jdeps which is a tool in JDK which can list dependencies of our jar file.

So in jlink command we use --add-modules to add Java modules which our jar file depends on them and also we add some other Java modules that we know Spring needs them.

6. Spring dependencies for custom JRE

I couldn't find a straight forward way for knowing Spring depends on which Java modules. But with some knowledge and also some try and errors this is the list that I found at last: jdk.unsupported,java.xml,java.sql,java.naming,java.desktop,java.management,java.security.jgss,java.instrument

7. Build docker image

Now we have both our application jar file and our custom JRE in a directory named myjre. So let's:

  1. create a Dockerfile for building final Docker image.
  2. Put this file in the root of your project

  3. as the final step we build the Docker image and show its size:
  4. Now we can call "docker image ls | grep amir/hello" and see that the image file is 180MB and much less than 238MB. Also we can think about the performance as we already have a JRE without unwanted modules in running memory when we run it.
  5. For final testing we can run the container by calling "docker run -p 8080:8080 amir/hello" and then go to browser and bring up "http://localhost:8080", then you could see a "Hello" in response.

8. Multi-Stage Docker image

As you see everything is done and we built our optimised Docker image for our Java application. But how we can simplify these steps by using multi-stage Docker file. For this purpose we can easily have a Dockerfile in our project root which would be able to:

  1. build the project
  2. and then build needed custom JRE
  3. and at last wrap them all up into a Docker image

You can see such a Dockerfile below, Also it's available as a whole project in Github.

post

Build a Docker Image Using Maven or Gradle

1. Story

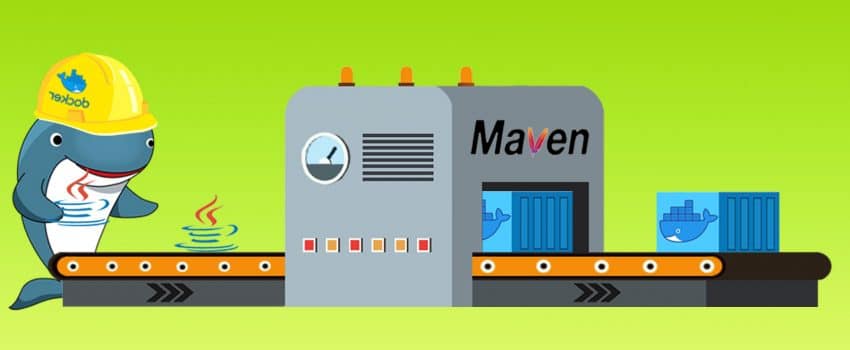
  • That is a common way to package our applications as a Docker image by using Dockerfile as explained here. But as a Java developer we use Maven or Gradle for building and packaging our applications. And so we want to make building of Docker image fits into our workflow.
  • Another story is that as a Java developer I do not prefer to build Docker images without a Docker daemon.
  • And also another story is that I have no deep mastery of Docker best-practices to build docker images and so that would be cool if a tool can keep care of building optimized Docker images for us.

2. Solution by using Jib

Jib is an open source tool that supports above need and builds optimized Docker and OCI images for your Java application without a docker Daemon. It is available as a Maven and Gradle and as a Java library. In common we can say that Jib is a compiler for containers.

In addition to the above advantages Jib also provides these facilities:

  • Jib separates your application into multiple layers, but how? : by separating dependencies from classes and not needing to rebuild entire Docker image. So Jib speed up your build process very effectively by rebuilding only the layers that changed.
  • Jib can also automate the process of pushing Docker images into your desired registry.
  • Not need to care about Docker best practices and following them across the team.
  • A docker daemon is not needed by using Jib, but optionally you can configure it to use a Docker daemon.

3. Sample java project

You can recruit any Java-Maven project that you prefer to carry out with this tutorial, but a recommendation would be using this Github repository as a very simple hello world Spring-Boot project.

4. pom.xml

The only thing that we must do is adding and configuring Jib Maven plugin In pom.xml file in our project. So at the begining below listing would be a proper point to make your hand wet:

Above listing is self-descriptive as well, and you can focus on its content for learning the concept but please take into these conciderations:

  • Replace your Docker hub credentials at line 4, 5, 6
  • <from> tag determines the base image which our final Docker image would be built from it
  • <to> tag is mandatory and determines name of our targeted Docker image
  • in <execution> part determined that running "mvn package" command will run also "mvn jib:build" goal. And so we now do have building our desired Docker image in our packaging workflow as an automatic operation.

5. jib:build vs jib:dockerBuild

As mentioned above we used jib:build in our pom.xml. But we should know that there is another goal named jib:dockerBuild which uses the Docker daemon in the hosting machine instead of ignoring it. This is important because in some situations we need this option. For example in next sections of this article you would see that we want have our built Docker image on our Docker daemon to see its history.

So we can also use dockerBuild goal instead of build goal in line 43 of above pom.xml.

6. Build Docker image

Now everything is done and running each of below commands would cause Docker image to be built and even pushed into Docker hub:

7. Docker image history

If we use jib:dockerBuild then we can see the Docker image in our daemon. Listing below shows running this purpose:


Now lets see what happend about Docker image layers as an optimization in building Docker image. For this pupose we ran below command:

That's great that we can see there are three images CREATED BY jib-maven-plugin and those COMMENTs shows us that there are three different layes for classes, resources, and dependencies. Now suppose that you change a line of your source code and rebuild your project, in this situation you would see that the build process will run very speedy, because the only layer that would be changed is the classes layer. So it will be the same if you only change in your resources or dependencies. And this is a great optimization without needing our team to be aware about docker image layers.


8. Next

In next article we will learn how to build smaller Docker images for our Java projects.

post

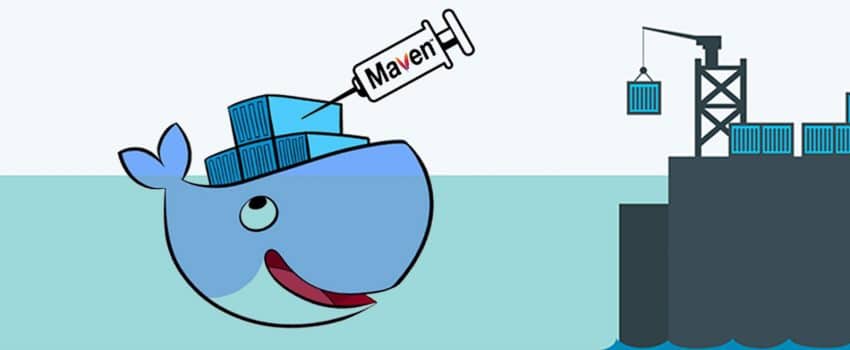
Inject maven dependencies into Docker image

1. Story

  • As a Java developer I want to build a Docker image
  • I want to aquire a Docker feature named multi-stage builds
  • While that process I want to prevent downloading mvn dependecies through building docker image process
  • So I want to manually inject dependencies into Docker image

2. Build Docker image

    1. Sample project:
As a simple sample project we have a Spring-Boot hello world project which responses on http://localhost:8080 You can provide your desired project or clone/download the github repository from here: https://github.com/AmirKeshavarz/hello-docker-java
    1. Create local Maven repo:
In terminal go to the project directory and run below command to download all maven dependencies and put them in a compressed file: * dependecy:go-offline cause all dependencies being downloaded * -Dmaven.repo.local=./repo makes a directory named repo and download all dependencies into it
    1. Create Dockerfile:
In project directory create a file named Dockerfile-injectrepo(Or it exists if you clone from our github) Note that in line 3 ADD command is injecting our pre downloaded maven repo into first stage of our Docker image.
    1. Build docker image:
For this step Docker must be installed on your system In terminal go to root of the project and run below command for building docker image: * Please notice that there is a dot(.) at the end of above command. In terminal run below command for having a test and run the container:
  1. Go to browser and browse into http:\localhost:8080
Below, a couple of points are mentioned which are not described here to keep this article simple.
  • Use -v option of docker for mounting your local maven repository and prevent downloading maven dependencies in build repetitive phase.
  • Use Maven plugins for building images instead of direct docker CLI commands.
  • Push docker image into a docker hub to make it accessible from hosts outer of your local.
post

Simple Java + Docker

1. Introduction

As a Java developer I want to build a lean Docker image for my java app. A Docker feature named "multi-stage builds" make this process so easy and straight forward.

2. Sample Project

As a simple sample project we have a Spring-Boot hello world project which responses on http://localhost:8080 You can provide your desired project or clone/download the github repository from here:
https://github.com/AmirKeshavarz/hello-docker-java

3. Dockerfile

In the root of the project there would be a file named Dockerfile containing below listing:

4. How to run

  1. Docker must be installed on your system
  2. In terminal go to root of the project and run below command for building docker image:
  3. * Please notice that there is a dot(.) at the end of above command.
  4. In terminal run below commands for running the container:
  5. Check your application in browser: Go to browser and browse into http:\\localhost:8080
  6. Check your docker container: Go to terminal and run below command:

5. Next

Below, a couple of points are mentioned which are not described here to keep this article simple.

  • Use -v option of docker for mounting your local maven repository and prevent downloading maven dependencies in build repetitive phase.
  • Use Maven plugins for building images instead of direct docker CLI commands.
  • Push docker image into a docker hub to make it accessible from hosts outer of your local.
post

Jdbc Template vs others

Recently we used JdbcTemplate in one of our projects. I tend to use Hibernate which is an ORM, whenever we need to work with databases. But lets have a short comparison between different options a java developer has for working with databases.

1. Java Database Connectivity (JDBC)

At first we can focus on the most basic alternative which is Java Database Connectivity (JDBC). JDBC is a standard java API for accessing data between the Java Standard Edition and a wide range of databases. In short we can say JDBC API tasks are:
  • make and handle connections to database
  • creating SQL statements
  • executing SQL statements in target database
  • viewing and modifying resulting records
In most cases JDBC programming is a pain for developers as they need to manage primary things such as connections with repeating some basic codes.

2. Hibernate (ORM)

Hibernate object relational mapping provides a framework for mapping an object-oriented domain model to a relational database. So developer can focus only on the domain model and deliver all database related concerns into Hibernate. For example you can define a POJO class and relate it into a database table, instantiate an object from your class and tell Hibernate to save that object into the database table. That's great as Hibernate handles almost all JDBC tasks itself. But what if you need to work with database schema.

3. JdbcTemplate vs Hibernate-and-JDBC

It would be necessary in some situations to work with schema directly. For example you need to read data from a table which don't know its structure. JDBC can be a pain and also Hibernate tries to hide database concepts and elements. So Spring introduces JdbcTemplate which uses JDBC internally and provides a more facilitated API. By JdbcTemplate we achieve the power of JDBC but no need for write boiler plate code. The Spring JdbcTemplate has following advantages over standard JDBC:
  • JdbcTemplate has mechanism to clean-up resources automatically i.e. releasing the database connections
  • JdbcTemplate converts Jdbc SQLExceptions into RuntimeExceptions which allows the programmer to react more flexible to the errors
  • JdbcTemplate converts the vendor specific error messages into more understandable and unified set of error messages
  • JdbcTemplate provides methods to write the SQL queries directly
post

JAVA vs Python

Pythonدر مقابل JAVA:

Duck Typing, Parsing on whitespace and other cool differences

پایتون جذابیتهای زیادی برای برنامه نویسان جاوا دارد، و این دو زبان شباهت ها و تفاوت های جالبی با یکدیگر دارند. در این مقاله تا حدی به صورت عمیق به بررسی تفاوت های این دو زبان می پردازیم. بزرگترین شباهت های آنها یکی طراحی شیء گرا در آنها می باشد به نحوی که هر دو زبان جمله ی "(almost) everything is an object" را در پس طراحی خود دارند، و دوم cross-platform بودنشان می باشد که این موضوع شامل مواردی از قبیل immutable strings و کتابخانه های استاندارد deep relative می باشد. همچنین تفاوت های بزرگی میان این دو زبان وجود دارد. در سطح community جاوا همواره از یک اسپانسر مالی بزرگ بهره مند بوده است در حالی که پشتیبانی پایتون بیشتر به صورت توزیع شده می باشد. از نظر Syntax نیز هر چند هر دو زبان در خانواده Algol-like می گنجند ولی Syntax پایتون بر پایه Whitespace می باشد در حالی که جاوا به مانند زبان های خانواهد C از پرانتزها و سمی کالن ها استفاده می کند. سختی کار در درک whitespace باعث شده برخی از برنامه نویسان از پایتون صرف نظر کنند، مثل برنامه نویسانی که به استفاده از ابزارهای مبتنی بر SGML عادت دارند. ولی استفاده از whitespace فی نفسه بد نیست و با استفاده از آن و غلبه بر عادت های قبلی برخی از افراد ادعا می کنند که این روش طبیعی تر و فطری تر نیز می باشد. هر دو زبان با عمل کامپایل به کد میانی bytecode ترجمه می شوند که بر روی ماشین های مجازی قابل اجرا می باشد. اما نکته اینجاست که پایتون به صورت خودکار و در زمان اجرا و اصطلاحاً به صورت Interpreter این کار را انجام می دهد و این در حالیست که جاوا یک برنامه مجزا به نام javac را برای این کار در نظر گرفته است.

یک تفاوت کلیدی: Dock Typing

بزرگ ترین تفاوت میان پایتون و جاوا اینست که جاوا Statically Typed بوده ولی پایتون Dynamically Typed می باشد. یعنی در زمان تعریف یک متغیر در پایتون نیاز به مشخص نمودن نوع داده آن نخواهیم داشت. هر چند پایتون نسبت به نوع متغیر ها حساس می باشد ولی تعیین نوع متغیر را به زمانی موکول می کند که این کار را واجب بداند یعنی زمانی که یک عملگر بر روی متغیر اعمال می شود و این عملگر خاص یک نوع داده یا کلاس خاص می باشد. پایتون در این زمینه یک جمله جالب دارد: "if it walks like a duck and talks like a duck, it's a duck" Dock Typing باعث می شود کد نویسی در پایتون بسیار ساده شود، خواندن کد نیز نسبتاً راحت خواهد بود ولی تحلیل کد کار دشواری می باشد. کلاس ها در برنامه نویسی شیء گرا معادل مفهوم مدل می باشند ولی این مفهوم یک ساختار ذهنی برای ما می باشد که سعی دارد ذهن ما را به دنیای واقعی نزدیک تر سازد. Dock Typing این کار را به زیبایی انجم می دهد چرا که دیگر نیاز نداریم از نوع یک شیء به دقت آگاه باشیم و فقط کاربرد پذیر بودن شیء است که برای ما جذابیت ایجاد می کند. بعنوان مثال یک تکه سنگ و یا یک چکش در برخی از کاربردها مثل شکستن گردو عملکرد یکسانی دارند.

یک نکته منفی در مورد نداشتن اطلاعات نوع داده

ایراد عدم آگاهی از نوع داده اینست که تحلیل کد دشوار شده و نمی توان فهمید در چه قسمتی از برنامه چه اتفاقی خواهد افتاد به خصوص وقتی که نام گذاری متغیرها به صورت معنادار انجام نشده باشد که معمولاً هم اینگونه است. بعنوان یک مثال افراطی دستور b.polish() مشخص نیست که قرار است چه کاری انجام دهد. در مقابل، جاوا Statically Typed می باشد متغیر ها در زمان کامپایل به انواع داده مقید می شوند. این بدان معناست که بسیاری از خطاهای نوع داده که در زبان پایتون در زمان اجرا رخ می دهند در جاوا در زمان کامپایل و قبل از اجرای برنامه کشف می شوند. و تقید متغیرها به نوع داده هایشان درک انسان و نیز کامپایلر را نسبت به کدها بالا می برد. هزینه ی این دست آورد اینست که برنامه نویس باید مراقب نوع داده ها باشد. در جاوا تبدیل نوع داده اتوماتیک بسیار محدود و ضعیف است و برنامه نویس مجبور است با دقت و آگاهی بالا نوع داده ها را مشخص کند. از طرفی پایتون نیازی به طراحی نوع داده قوی ندارد و از اینرو برای کارهای Prototyping مناسب می باشد. همچنین این خصیصه پایتون باعث می شود این زبان برای افرادی که دانش و تخصص بالایی در برنامه نویسی ندارند به راحتی از آن استفاده کنند در حالی که جاوا از این نظر نیاز دارد که برنامه نویس از دارای تخصص کافی باشد.

پایتون کار راه انداز است

پایتون به شما این امکان را می دهد که به سرعت کار خود را انجام دهید چرا که کدنویسی در آن ساده بوده و نیز در فضای وب کدهای آماده زیادی برای استفاده وجود دارد. از طرف دیگر تست های کاربردی نشان داده است که پایتون قابلیت ارائه سرویس ها و اپلیکیشن های بزرگ را دارد. همچنین پایتون این امکان را به شما می دهد که کتابخانه های ریاضی Fortran را در الگوریتم های آماری R به خدمت بگیریم. در آخر باید به این نکته هم اشاره کنیم که یک نسخه از پایتون به نام Jython نیز وجود دارد که به JVM byte-code کامپایل می شود، که به خوبی امکان بهره مندی همزمان از محاسن پایتون و کتابخانه های جاوا را فراهم می سازد.

ارزش یک بار دیدن را برای برنامه نویسان جاوا دارد

جاوا یک گام بزرگ در ساده سازی صنعت نرم افزار در مقابل C++ بوده است به طوری که بسیاری از برنامه نویسان شیفته ی همین ویژگی جاوا هستند. پایتون نیز یک گام بزرگ دیگر در همین مسیر می باشد، که محیطی ساده تر و قابل فهم تر برای انسان فراهم آورده است و به این صورت دنیای ماشین ها را به واقعیت نزدیک تر می سازد. با این وضع برنامه نویسان جاوا خوب است که نگاهی به پایتون داشته باشند. این زبان برای اتوماسیون کارهای تکراری و خسته کننده عالی بوده، و نیز یک زبان خوب برای توکار شدن در اپلیکیشن های جاوا می باشد. بنابراین پایتون یک جایگزین مناسب جاوا در بسیاری از موقعیت ها خواهد بود. و در کل دلیلی ندارد که پایتون را دوست نداشته باشیم.   در پایان لازم می دانیم یک دوره آموزشی ساده و با کیفیت پایتون که رایگان نیز می باشد را معرفی کنیم. این دوره آموزشی شامل ویدئو و نیز کنسول آنلاین برنامه نویسی می باشد و از مجموعه دوره های Code School می باشد: https://www.codeschool.com/courses/try-python  
post

Base 64 چیست و چه کاربردی دارد؟

images فرض کنید شما یک داده ی باینری دارید و می خواهید آن را در بستر شبکه انتقال دهید. به طور کلی شما این کار را تنها از طریق Stream کردن بیت ها و بایت های خام انجام نخواهید داد. چرا؟ زیرا ابزارهایی برای Stream کردن متن وجود دارد. شما هرگز اطلاع ندارید که برخی از پروتکل ها ممکن است داده های باینری شما را به عنوان کاراکترهای کنترلی تفسیر کنند ( درست به مانند یک مودم) و یا برخی دیگر از پروتکل ها همانند FTP ممکن است تصور کنند که شما یک کاراکتر خاص مانند ending را وارد کرده اید. mccaffrey-fig3 بنابراین برای مقابله با این مشکلات داده های باینری را به رشته ای از کاراکترها کد گذاری (encode) می کنند. Base64 یکی از انواع این گونه کد گذاری می باشد. چرا Base64؟ زیرا با استفاده از آن شما می توانید همواره بر 64 کاراکتری که در اغلب مجموعه کاراکترها (character set) ارائه می شود حساب کنید و بنابراین از نحوه ی صحیح نمایش داده های خود در سمت گیرنده اطمینان بیشتری کسب کنید. استفاده از Base64 برای طراحان وب کاربردهای بسیار مفیدی دارد. بعنوان مثال می توان برای جلوگیری از ارسال یک Request اضافه از سمت Client آیکون معروف به Favicon را به جای فایل درون تگ جاسازی نمود که در زیر نمونه آن را می بینیم: <link href="data:image/png;base64,iVBORw0KGgoAAAANSUhEU. ..." rel="icon" type="image/x-icon"> حتماً این سوال برایتان به وجود می آید که در مثال بالا چطور می توانید یک تصویر را به Base64 تبدیل کنید. برای این کار راه های مختلفی وجود دارد ولی یکی از در دسترس ترین راه ها استفاده از اپلیکیشن های آنلاین است که در زیر یکی از آنها را می توانید ملاحظه کنید: https://www.base64-image.de/