
Recently I had a nice experience with Jenkins in which I worked with many different facilities CI/CD and concepts via Jenkins. In this article I want to share this experience as short as not being boring.
Jenkins is The leading open source automation server, Jenkins provides hundreds of plugins to support building, deploying and automating any project. (cited from jenkins.io)
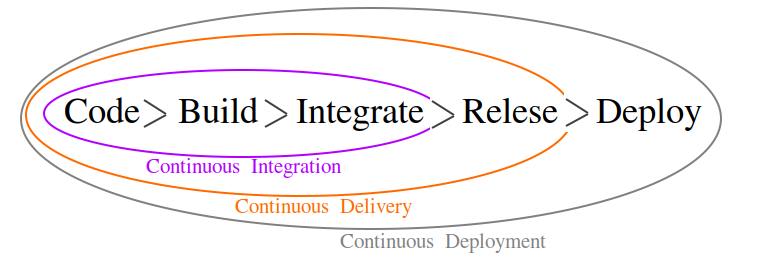
1. CI/CD (Continuous Integration/Delivery/Deployment)
Jenkins is a tool for continuous integration and continuous deployment (CI/CD) which is widely used in many projects because of its simplicity and independence. I don't want to make this part long so below picture shows you the meaning of three expressions of CI/CD and their differences in a big-picture.
2. Install Jenkins
Based on our conditions we decided to install Jenkins as a Docker container. Docker provides the ability to package and run an application in a loosely isolated environment called a container. The isolation and security allow you to run many containers simultaneously on a given host.
Jenkins describes how to install it as a docker container in the formal website but there is a point to make it much better by a small change about not using docker-in-docker(dind). So I write all steps on macOS and Linux here without more description and at the end describe just about the point.
|
1 2 3 4 5 6 7 8 9 10 11 12 |
docker network create jenkins docker volume create jenkins-docker-certs docker volume create jenkins-data docker container run --name jenkins-blueocean --restart=always --detach \ --network jenkins -v /var/run/docker.sock:/var/run/docker.sock \ --env DOCKER_CERT_PATH=/certs/client --env DOCKER_TLS_VERIFY=1 \ --volume jenkins-data:/var/jenkins_home \ --volume jenkins-docker-certs:/certs/client:ro \ --publish 8080:8080 --publish 50000:50000 jenkinsci/blueocean |
As you can see we have "-v /var/run/docker.sock:/var/run/docker.sock" which makes "dind" needless. Dind is a docker engine running as a container on host's docker engine. And instead of dind we used host's docker engine itself by socket solution. At the moment In Jenkins formal website there is one more step before running Jenkins container which is running docker-in-docker container and use it in Jenkins container with adding this "--env DOCKER_HOST=tcp://docker:2376". But we don't need it any more.
The main idea which caused me thinking about removing dind is that it will be unstable in some situations in which it would be probable to loose our dind image and all Jenkins needed utilities installed on that dind. So I googled and found some hints and between them also found an article written by one of dind contributors, "Using Docker-in-Docker for your CI or testing environment? Think twice"
Our project code is written by Java and for some reasons I also mount JDK and Gradle from our host into the Jenkins container. Also some unnecessary parts removed. So at last I had run below command instead of last one:
|
1 2 3 4 5 6 7 |
docker container run --name jenkins-blueocean --restart=always --detach \ --network jenkins -v /var/run/docker.sock:/var/run/docker.sock \ -v /home/keshavarzreza/jdk/jdk1.8.0_241:/opt/jdk/jdk1.8.0_241:Z \ -v /home/keshavarzreza/gradle/gradle-4.7:/opt/gradle/gradle-4.7:Z \ --volume jenkins-data:/var/jenkins_home \ --volume jenkins-docker-certs:/certs/client:ro \ --publish 8080:8080 --privileged jenkinsci/blueocean |
Now we can browse http://localhost:8080 or http://your-host-ip:8080 to access Jenkins UI, and follow its instruction for defining admin user/pass.
3. Install JDK on Jenkins
I know that JDK is not the only kit you need but here I tell about my experience just about JDK and Gradle and you can map this into other needs like nodeJS, Maven, etc.
Jenkins lets install multi JDKs (for example you need different versions). As described in above section, we extract JDK on host and mount its root into our Jenkins docker container. Also it would be possible to install JDK on Jenkins image/container itself which I don't want to do that here. Now that we already have JDK mounted in our container:
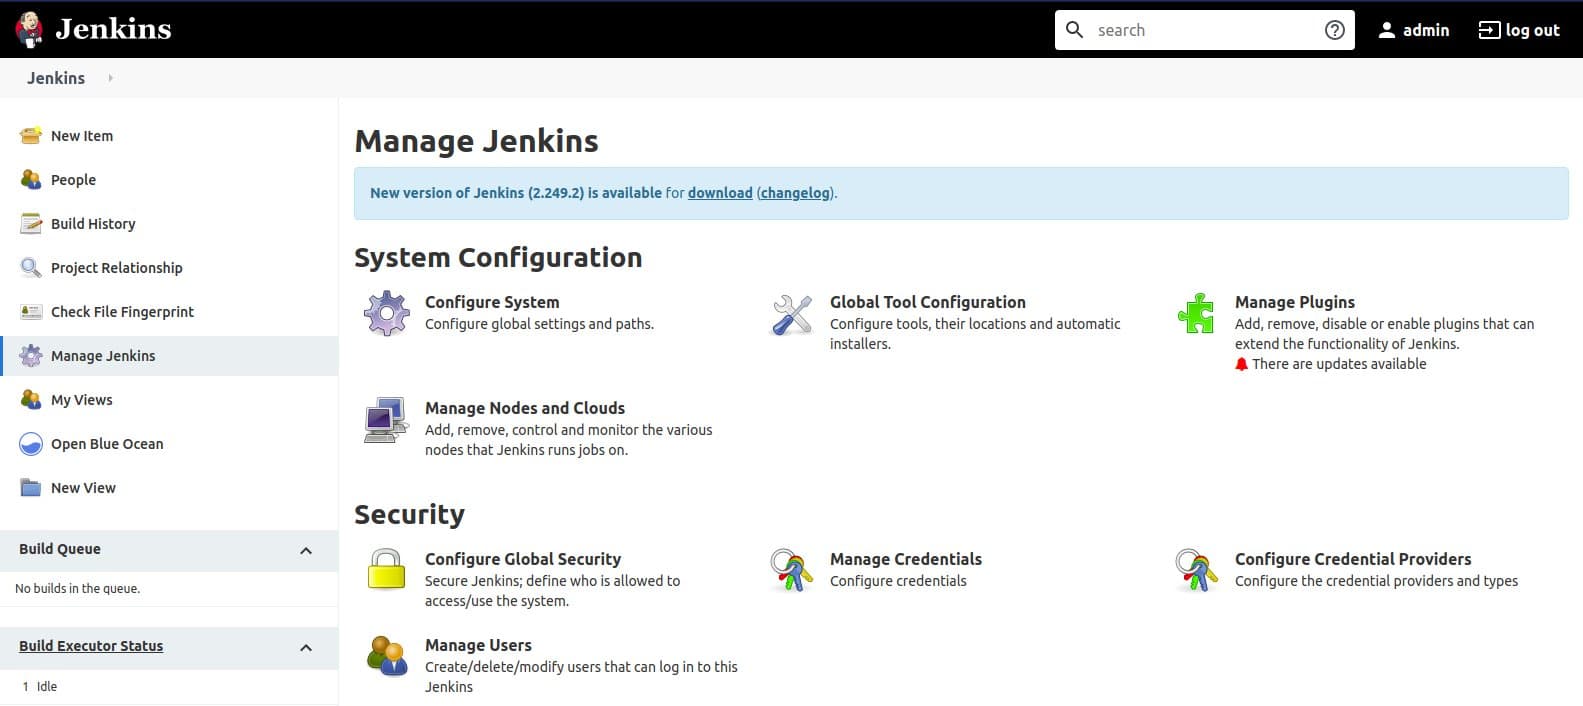
- login in Jenkins panel
- go to "Manage Jenkins"
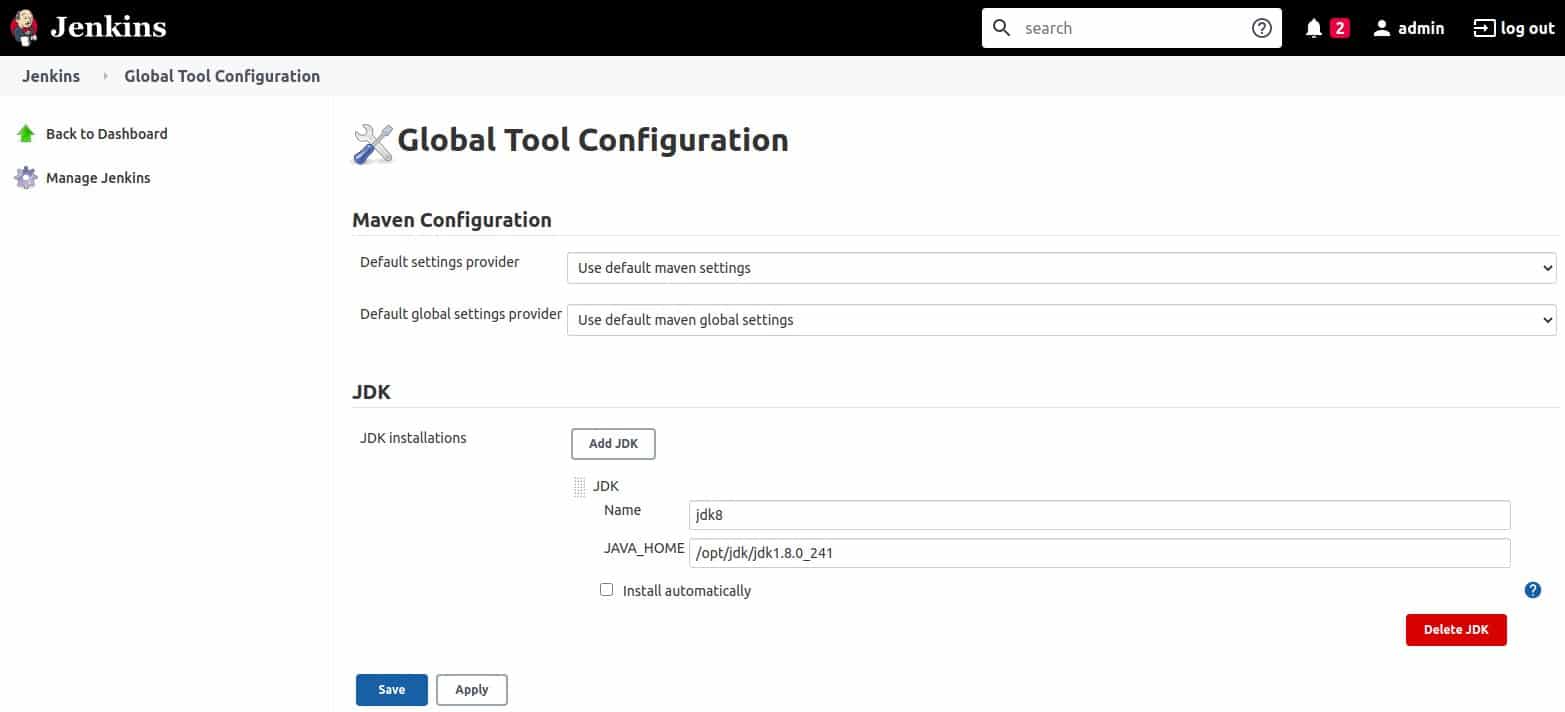
- "Global Tool Configuration"
- click on "JDK Installations..."
- Type a name in "name" text-box
- Type JDK path based on mounted path in prev section in "JAVA_HOME" text-box (/opt/jdk/jdk1.8.0_241 in our case)
- click on "save"
As mentioned we did such work for Gradle and you can do it for other toolkits.
4. Create Simplest Project in Jenkins
On Jenkins UI click on "New Item" then type a name for this project and select "Freestyle Project", and then click on "OK", Now you have a very simple project for first try.
In configure project go to "Build" section and click on "Add Build Step">"Execute shell". This is a very simple try for moving our hands on the main work. Write some shell scripts there for example: echo $JAVA_HOME , java -version . Click on "Save" and at last click on "Build now". At last you can select your build number and click on "Console Output" to see what Jenkins cooked for you and how things matched together.
5. Jenkins Pipeline
Now that's time to move one step toward more advanced features and I think working with "Pipeline" would be a very main step. Repeat previous part steps to add a project but this time select "Pupeline" instead of "Freestyle". Pipeline script is a groovy-based syntax which Jenkins provides it and you can code it while configuring your project.
6. Pipeline as Code
I know that two steps are missed lets say "Installing plugins" and "Connect project to Git". And I would add them here or on another article soon. But for completing the puzzle I'm eager to write here that we made a file in our Java source code (in git) named "Jenkinsfile" and code our desired Pipeline steps there. After that we told our Pipeline Project in Jenkins to follow that file as a Pipeline-code. Sorry for lack of my time and notes here, all these steps would be added or linked here soon.